Introducing a DIY toy organizer is one of the best ways to stay organized and prevent clutter in your home especially when you have little children. You can create a storage solution that satisfies both practicality and aesthetics. While purchasing pre-built organizers may seem like the only option, often, they aren't the exact size you need. DIY toy organizers can make a great nod to your home decor, and with the following thoughtful ideas and tutorials you can create a wide variety of toy storages that fit your particular space and toy-trimming needs.
Types of Toy Organizers
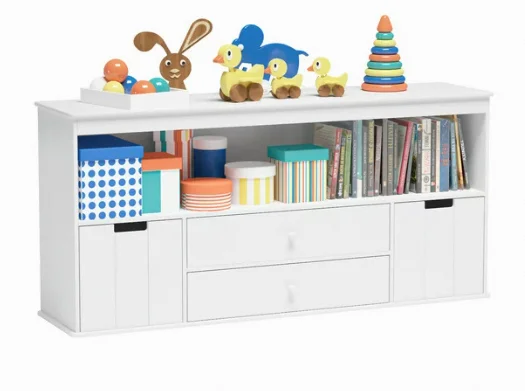
Before getting down to the step-by-step tutorials, let's go through some of the types of toy organizers you can create at home.
• Bookshelf Toy Organizer: A bookshelf toy organizer suits best for board books, drawing pads, thin movie magazines, puzzle holders and other slim lightweight toys. Use wire baskets or fabric bins on some shelves or total depth can shift to accomodate the different toy sizes.
• Labelled Open Bin Organizer: In the family room or open playroom, an attractive wall-mounted collection of wire baskets or slotted wooden boxes are suitable for defining and storing collections of similar toys.
• Rolling Utility Cart Organizers: Taking organization around different rooms within the home or on outdoor excursions becomes effortless with rolling utility cart toy organizers that have several shallow tier workstations.
• Room Divider Toy Organizers: These types of organizers separate the playing area from eating or living areas. Side toy storage systems combine twistable tabletop picks and draping pockets. You can move the dounge setup by adding fasteners to the doorcasings and swapping the toy-holding organizers of the multiple doorways.
Now that you know the distinguishing types of organizational resources that are best suited for each room or situation in the home, here are the comprehensive steps that you can follow to create a toy organizing solution.
DIY Bookshelf Toy Organizer
Supplies
• Table saw • Drill plus brad-point bit ends • Kreg pocket hole jig • Joiner plus plates • Right-angled level • Finish nailer • Marker knife • Paintbrush • Primary Color Paint
Instructions
- Cut 8 9 ¼-by-31½-inch beveled panels, one 10 ¼-by-31½-inch beveled front cover trim panel, an 8-by-10½ -inch backing board, one 10-by-31 ½ -inch on the side top panel and one 11-by-31½-inch side panel zenith for two couplings.
- Mark the places for scene fix-holes 2” deep if possible.
- Use your saw to plunge cut eight of these dial-shaped scenes out and deepen one or plunge semi behind each scene. This is a good feature if the shelf has an ornament design so it can rest securely furthermore.
- Add these shelves to one of the side panels using a Kreg jig, or attach them to both side panels too before fixing the panels to the top and lower boards, like borders, of the case.
- Now you can fix the side panels with two joined dowels each for added structure.
- Since woodworking furniture designs inevitably necessitate touches of paint, apply colored trimming vinyl alongside interior shelf liners or any painting needed.
- Finally, trim the final finishing touch, mount them on aesthetic extenders, apply gloss finish to the beveled surfaces.
Open Bin Toy Organizer DIY
Supplies
• Caddy clips • Pin nailer and 1⅜-inch buzz Ends • Countersink grindstone • Screws and screws retaining driver head • Bevel-ground broadleaf lumber service range of lumber boards/two coat hangers • Paldagonium-color-accent paint applicator pain brushes • Primed and smooth-surface paint-free metal storage baskets/woven handwoven of leather-crafted wire adorning base outfits for the organizers
Instructions
- Pre-sand underside of the base coat.
- Redefine this specially tapered slant edition by driving in the surface screws for two hinges, then deciding which rails the bookend-style organizers bracket need to be serenely mounted.
- Countersink in stepped joints to accommodate non-directional interchangeable baskets.
- Clearly partition your floor with unique color-painted block-group collections of similarly shaped basket organizers.
- Finally, screw filled boxes onto attached rods or loops, and refinish secured attachment-piece bases either using adorning accents like ethically carved faux slate patterns, slat wall and bare-boned baskets or by adding fun labeling accessory that reflect the characterization of the items these baskets store.
Rolling Toy Cart Organizer DIY
Supplies
• Speed bit ends and power multi-sized woodworkers tools • Screws and pneumatic and staple guns • Lightweight colorful fabrics, threading tool pro as filler padding for the mattresses • Fabric glue • Rub-on permanent personal labels
评论
发表评论